It's PhoenixDestruction's birthday week!
PhoenixDestruction's avatar

PhoenixDestruction

Phoenix
133 Watchers15 Deviations
43.4K
Pageviews
Hello Deviants, Welcome to week 30 of deviant365! :dummy:


Last week, we asked you guys to comment and share a thumb of your favourite fandom(s), we've had some great entries, but only one person can swipe the 3 Month Premium Membership, so I would like to bestow it on ninquetari for sharing an excellent deviation based on the work of J.R.R Tolkien.


From The Shire To The Sea - jgilronan


'For the last few years - ever since I actually read Tolkien's books - I've been deep in Tolkienverse. The thing that fascinates me the most is the depth of mythology Tolkien has gone into in order to create a world that feels complete. Of course, because he was human, things were written and later rewritten, and multiple versions existed in his mind in different stages of the creation. Still, I think it represents the beauty in art, and I admire the ability to both create and hone details.' - ninquetari


So, this is week 30, which also means a brand new task or you guys!

So what's your favourite category on deviantART?  Let's take away 'Scraps' and 'Journals', tell us about your favourite category on deviantART and share a deviation which relates to your description.

All we want you to do, is comment and tell us about your favourite art category on the site and with it, post a thumb of a deviation in the comment of a deviation to represent all the reasons why it is your favourite category and you could be in the chance to win 700 :points:

:bulletblue: Post a comment and deviation thumb to represent your favourite art category on deviantART.

:bulletblue: All entries must be submitted by Thursday 24th July at 23:59:59 PDT .

:bulletblue: One deviant shall receive 700 :points:.


Join the community to add your comment. Already a deviant? Log In
Interview and Feature with -


Tell us about yourself and the work that you do. :dummy:

My name is Morgan Loebel (aka, Morgans Mutations) and I make creatures, monsters and mutated things out of polymer clay. I love creating beings that have realistic features, from the eyes, teeth and the wrinkles in its flesh. Born and raised in the mid-west, I presently reside in beautiful Lawrence KS. I have been creating unusual art for as long as I can remember. But only just discovered polymer clay in late 2012. After completing my two year training in technical drafting right out of high school, I began my twenty year long career as a dental laboratory technician. This was an extremely meticulous career, it was also one that required patience, artistic skill, and a steady hand. I fabricated realistic, detailed crowns, bridges and other dental prosthesis at high volume…in the 20 years I was at the lab I must have made hundreds of thousands of teeth. My long dental career was key in my progression from dental tech to mutant maker.


Bad Seed II - The Transformation Challenge by MorgansMutations
'Bad Seed'

How did you initially become inspired to create them?

I was busy with graphic design years before I found the clay. My initial exposure was when I was developing some graphic design art for the Stan Winston School of Character Arts. There are some amazingly talented artist and instructors at that school, molding with polymer as well as other types of clay used in the film industry. Immediately after buying my own block of clay I was hooked!

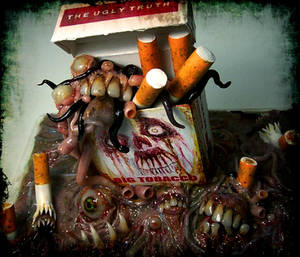
EYE ball point pen by MorgansMutations    The Toxic Truth / Making Some Ugly by MorgansMutations
'Eye Ball Point Pen' and 'The Toxic Truth'

What keeps you motivated and inspired to create more original designs?

Sometimes I would enter contests to keep inspired and driven with new ideas. Inspiration is everywhere, I often have dreams about my next projects, I even scratch out a quick sketch sometimes before the idea is gone.

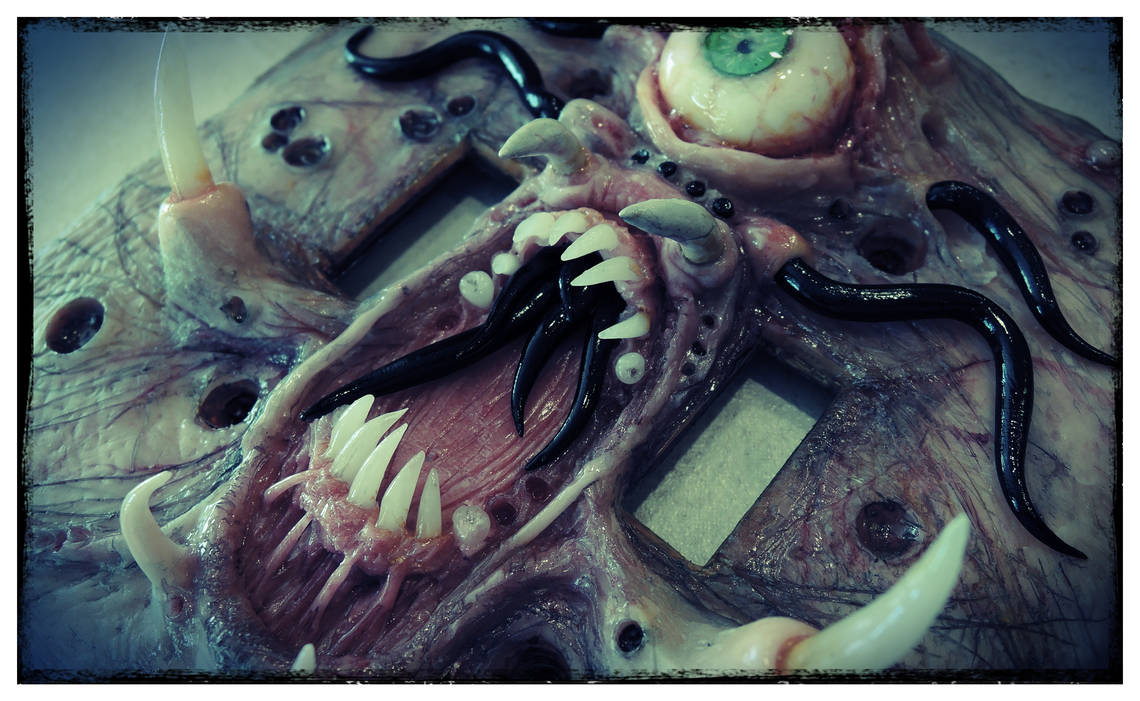
Demon Mirror 2 - dark reflection by MorgansMutations  Green eye, tenticals and teeth.. by MorgansMutations
'Demon Mirror' and 'Green Eye, Tentacles and Teeth '

You're works are beautifully macabre, I hope you don't get any negative reactions to your work?

That’s funny. Actually YES. There are some people that think the stuff I make is creepy, scary, gross, and disgusting. But that’s cool, at least they are having some sort of reaction to my work…I would take “creepy” over “boring” any day. 

Bathroom Break by MorgansMutations
'Bathroom Break'

What materials do you use?

My list of materials is always changing. I find myself sometimes trying to replicate some of the work I’ve done at the lab without using dental acrylics and powder porcelains that are baked in high temp kilns.
The magic is in technique of course, but the materials I mostly keep returning to are polymer clay, resin, armature wire, aluminum foil, epoxy putty and acrylic paints, stains and protective varnishes.

The Thing Ring by MorgansMutations  gross little bunny skull pendant by MorgansMutations
'The Thing Ring' and 'Gross Little Bunny Skull Pendant'

If you had infinite supplies and time, what sort of project would you like to work on?

That’s interesting.. not sure. I do enjoy my time in the studio but the down time is just as important.

(wise words)

I want your fingerz...and your cards by MorgansMutations
I Want Your Fingerz.. and Your Cards

Thank you so much Morgan for offering us the chance to get to know you, and behind the scenes to your fabulous artwork, keep em coming!


Join the community to add your comment. Already a deviant? Log In
Hello Deviants, Welcome to week 22 of deviant365! :dummy:


Last week, we asked you guys to find a tutorial and explain to us how you found it useful in your artistic endeavors, I'm happy to announce that Scytheia has won a 3 month premium membership and Nebunezzari has won 300 :points: courtesy of deviantART.

Scytheia shared with us Composition Tutorial Values by AlexTooth, and feels a lot more confident with the understandings of the different formats of composition as a general whole.

Nebunezzari  has shared Skin a tutorial part 1 by navate and explains that she feels a lot more confident in playing with variations of skin tones to create the best results.

Congratulations guys! :clap:


So this is week 22, so let us get straight to this weeks task!

We want you guys to go out there and explore the different galleries of deviantART, visit a gallery and sub gallery you would least expect to be browsing and share with us a deviation that really catches your attention. Tell us a bit about why you are drawn to the deviation, and also about the gallery it came from, does this perhaps change your views on that particular gallery or no?

This is a little exercise to hopefully help you guys appreciate different galleries a lot more that you would normally venture out to. There isn't a right a wrong deviation to choose, but explaining to us how searching through an unknown gallery makes you feel, One lucky deviant will receive a 3 Month Premium Membership for the most compelling explanation and deviation.

Also up for grabs this week is TWO 200 points:points: for taking part in this weeks task.

Remember, there is no right or wrong answer here. Simply post a deviation from a gallery you wouldn't normally browse through, or even at all and tell us about your experience. Be honest with your explanation, but don't be crude or disrespectful towards that gallery, the whole idea of this task is to find out what your tastes are, and what aren't. 

:bulletblue: Post a thumb of the deviation in the comments below, and explain to us what made you choose it.

:bulletblue: All entries must be submitted by Thursday 29th May at 23:59:59 PDT

:bulletblue: One deviant shall receive a 3 Month Premium Membership and Two deviants will receive 200 :points: each courtesy of deviantART.

:love:

Join the community to add your comment. Already a deviant? Log In
Welcome to this weeks Undiscovered Weekly article for Artisan Crafts, Where we are committed to hand pick exceptional, new found talent in which we would like to share with the rest of deviantART.

This week we will be featuring 3 very different, but very talented artist which I would like to share with you all today.


Christmas in January ~A Holiday Exchange~ by lonelysouthpaw  Momo on Cactus Juice by lonelysouthpaw

lonelysouthpaw is a self taught hobbyist who enjoys to create sculpts of original and custom designs of many sorts. They are currently attending a graduate school, and tries their best to fit in time to create some awesome miniatures in their spare time. lonelysouthpaw started sculpting in 2012 when spare time was more available before their course at graduate school. They started out with polymer clay and the hobby has become a sort of addiction ever since, and clearly, the amazing talent has blossomed into something more extraordinary for the rest of us to appreciate.

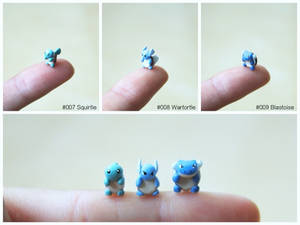
Pinkymon: Bulbasaur, Ivysaur, Venusaur by lonelysouthpawPinkymon: Charmander, Charmeleon, Charizard by lonelysouthpawPinkymon: Squirtle, Wartortle, Blastoise by lonelysouthpaw

Like every other artist, lonelysouthpaw gets inspiration from everyday life, so anything from video games, to cartoon, comics, movies and manga/anime for example; to everyday nature and life. It inspires us all and helps us create the art we all do in our unique style, as long as we enjoy what we do, is most important. Creating original and familiar characters is one of the favourite pastimes of lonelysouthpaw with perhaps a little twist of emotion, pose and personality. They hope to gain more experience from sculpting these characters into their more original designs as their hobby progresses, infusing more originality into their own work as they improve their own skills over time.


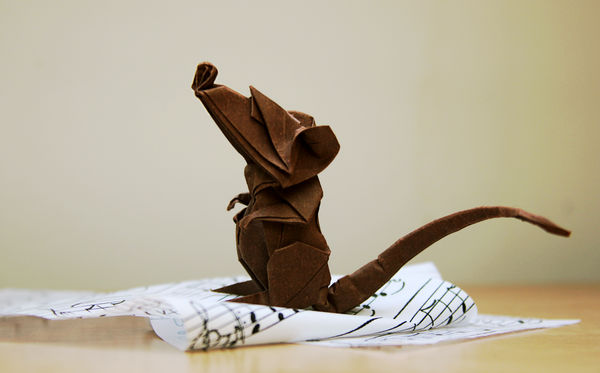
Origami Rat by nekomancer123  Dancing Crane by nekomancer123

nekomancer123 is 15 years old and comes from Poland, they are an artist through origami and traditional pieces which are curiously good! There is always a lot more to another artist that one style of art, we usually have a second genre we like to work on, sometimes completely different! nekomancer123 was first told about origami in June last year, and starting crafting easier models like flowers or paper dolls!

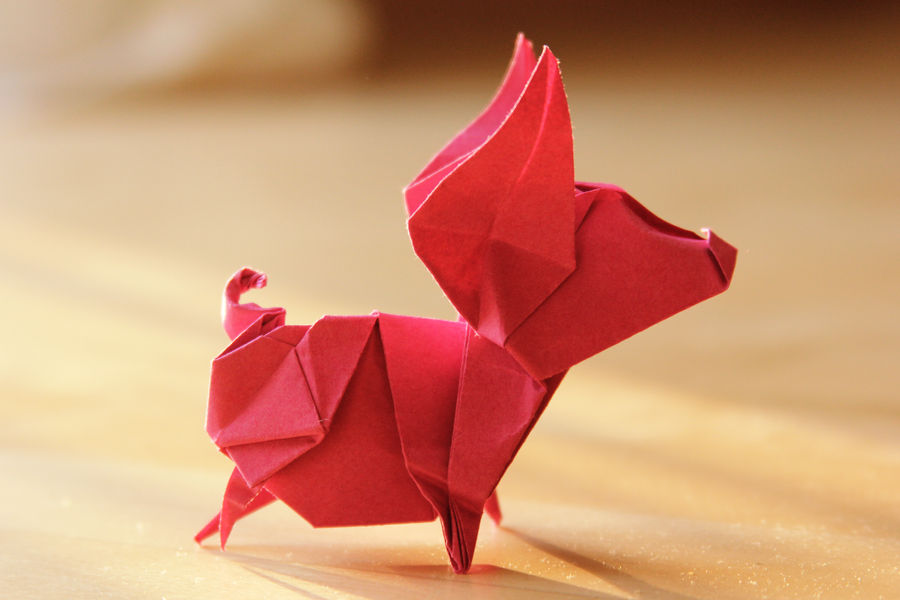
  Piggy by nekomancer123

nekomancer123 sees inspiration in many things, such as everything that involves nature, from plants to insects to animals. The initial question is how would that be folded into origami? What technique is there to make this species of plant or animal stand out! Using the correct paper is also very important, the thickness of each piece can effect the initial sructure of paper, so it is something that is worth looking into if somebody is wishing to start an origami project of their very own.

nekomancer123 also uses a selection of different colours in their work to make the design stand out, just the use of only 2 colours of paper in origami use goes a long way and really puts emphasis on the hard work used on the original design.


HopeAndGracePens is an original artist who specializes in pen turning, the process which is more commonly termed as wood turning, a process of turning and carving wood. In this case, pens.

Bryce is an active-duty U.S. Marine currently stationed at Marine Corps Air Station in Iwakuni, Japan. He is also a husband and father of 2 daughters, Hope and Grace. Which is clearly the center of his pen making.

Bryce took a pen-turning class and got hooked. He specializes in designs and inlays, almost always of wood and other natural materials but has been known to incorporate aluminum and vinyl to get just the right look. He takes every pen as a work of art first and a writing instrument second, giving each a meticulous attention to detail in design and execution.

Blood wood desk set with macacauba case by HopeAndGracePensCandy Striper by HopeAndGracePens

The ability behind wood turning is a simple process, but difficult to do correctly. Also to be able to construct into a pen requires a lot of patience and personal judgement to finish the design with a very clear and pristine finish. To HopeAndGracePens a pen is more than a writing instrument, hand crafted and finished to perfection. The art behind it is a talent and a unique style of crafting which delivers more than just positive memories and satisfaction.

I'd like to personally thank these exceptional deviants for their immense talent and sharing with us their artistic endeavors.


:iconphoenixdestruction:
Found an undiscovered talent in Artisan Crafts?
Feel free to note me your suggestion.


If you wish to suggest an Undiscovered Artist in another category, then please click on the category title to find the deviant who features this category in Undiscovered Weekly.
Please send your suggestions in a note.


Join the community to add your comment. Already a deviant? Log In


Introduction to Casting


Casting is a process in where a solution(usually mixed with a curing agent, or hardener) is poured into a desired mold and then left to set and become a solid, which gives you the desired structure. This process is thousands of years old, and comes in many different forms. Examples of casting are metal casting (or metalwork), glass casting, resin casting and many others. Literally anything you can pour into a mold which becomes solid is considered to be in the art form of 'Casting'. It's regarded as a diverse practice, so no one can really define a specific cast, it's usually up to the artist to use a preferred or specific cast to get the most desirable results.

So what do I need?


It depends on what you want to make exactly. There are so many different types of casting resins and solutions you can use to give you different desired effects. Today however, I am going to show you how to work with a polyester resin and a silicone mold. The example product I will be casting is from Bethesda's Elder Scrolls V: Skyrim, a Dragon Priest Mask.

The materials I have used are as followed...

Equipment by PhoenixDestruction

For the paper mask;
Papercard. (Just thicker paper than normal.)
Copydex Adhesive.
Sellotape.
Crafting knife and mat.
Glue stick (Because you never know!)
2 sheets of rubber foam.

For the cast;
Spray Paint - It usually doesn't matter which one, but this will prevent the lacquer from penetrating the paper and ruining it.
Clear Lacquer - Please get this in spray, as it applies a nice even coat, unless preferred otherwise.
Liquid Silicone Rubber - with curing agent.
Polyester Casting Resin - with hardener.

Finally... Safety First.
Presuming that you guys will not buy more dangerous products to begin with, such as Rondo or Fiberglass Resin. I still highly suggest that you put safety first, and use safety gear such as gloves and a mask, especially when casting. A well ventilated environment for hard sprays and the cast and last but not least, patience. It WILL take some time to let a lot of the used materials to set, especially the mold and the resin. the only silicone rubber I could find recently, recommends that I leave the mold to set for several days before I cast, so don't be surprised if the product you are using will say the same thing.

Creating the basic structure.


Depending on what you want to make, will depend on what you will use to construct the base, which will be replicated by the mold and the casting material. I'll be using a thick craft paper to get the initial base structure of the mask, which I will be folding together.
I'd suggest start with something simple, so you learn yourself how the materials and solutions work.
The design I am using is just for this article, so I have used a free-to-use design from Pepakura which also has a lot of really cool designs for crafting with paper. You can find Pepakura Designer here.
I'm using about 10 pages of thick crafting paper, which is printer friendly because this is what I am going to use to form the shape of the mask. It is crucial that you are 100% satisfied with the structure before you cast, because any imperfections will obviously be replicated onto the final design.
Typical casters may sculpt their designs with clay or wood, or even build it together with other materials, such as rubber foam, Styrofoam, paper or card(board). It's really interesting playing with these different materials to get the best techniques available.
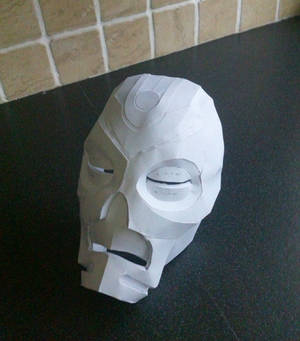
Papercraft: Dragon Priest Mask by PhoenixDestruction   Papercraft: DPM 2 by PhoenixDestruction
I added some cut outs from rubber foam sheets for an extra dimension.

Once you have finished your initial design, it's time to mold! It's usually a good idea to seal the base design with something so that the different materials you may have used, will not stick to the molding solution when you are applying it. I spray painted my paper mask white, and finished it with a few coats of clear lacquer, which also helps make the mask more sturdy and hard, so it is easy to work with when I apply the silicone.

Creating the mold.


The mold I am using is called 'liquid silicone rubber', so it's the cheapest and most practical method for the use of a design like this, since it is made of paper after all. I don't want to use the silicone used for impressing, as that would damage the paper mask. I started off by mixing half of the liquid silicone and half of the curing agent and applied it straight away all over the mask,(with an inexpensive nylon paintbrush) deep into the crevices so that all the details are picked up, I then mixed the rest of the silicone and curing agent, and let it set for 1 hour, so it is more like a gum, which I then apply on top of the first layer of silicon, so we have quite a thick layer that is not dripping off the edge because we let it cure briefly. I then leave to set for 16 - 24 hours as instructed on the tin. (Be wary that whatever mold that you use, always follow the instructions and take note of the curing and setting times of the mold, so that the best practice is applicable.)

Tip: Nervous about the silicone literally sticking to the base structure and tearing it apart? Usually, most materials won't stick, but you could always brush on a little dusting of talc before slapping on the mold for an extra precaution, even it you aren't nervous, it won't have any ill effects. :)
Note: When first mixed with the curing agent, silicone has the consistency of PVA glue, which then starts to become thicker and gradually setting 20 - 24 hours later, the latest time you are advised to use it is less than 2, otherwise it is completely unmanageable.
 Also please be aware that if you apply all of the silicone straight away, it will all start to drip down the sides and rough corners will petrude through, so using the rest of the silicone when it has cured to a liquid chewing gum like consistency. It will stay in place and not drip and reveal the original structure. (about 1 - 2 hours curing time)

mixing silicone by PhoenixDestruction  Molding: Step 1 by PhoenixDestruction  making the mold 2 by PhoenixDestruction

I highly suggest that any base structure you have is free of unwanted nooks and crannies, because the silicone will seep through. This can be removed later on, but it is a pain in the backside, and you risk damaging the mold. When you are happy with the mold setting, firmly, but carefully peel the mold away from the base structure, remove any unwanted flaps of silicon that may have formed until you are happy and you are ready to cast! I've made slight mistakes on this particular molding process, it really is important that you lay the silicone on THICK, so that you can't even make out the original design, this is very important because the mold needs to be able to support the weight and contain the unmixed liquid resin.

The Cast


The casting is pretty simple, but I must insist you thoroughly read the instructions given with the resin, or cast that you have got, they are all different and I can only give you guide examples with the particular cast I am using. The instructions I have are, 'In a well ventilated area, mix 1 - 3% hardener with the resin and mix well with a 'stick', then let it rest for 5 minutes to disperse of any bubbles caused by mixing' curing time 130 - 150 minutes, and eventually a solid block 4 - 6 hours.' - With this I added a little bit of resin colouring, jet black so that it isn't clear so I can see where I can sand it down later on. Please be aware that the instructions with the resin are only a guide, so use your own judgement when it comes to curing times, see the next step.

Resin materials by PhoenixDestruction  Mixing the Cast. by PhoenixDestruction

NOTE: as soon as the hardener has been mixed in and set to rest for 5 minutes, please work quickly and never leave unattended, before you know it, the cast will turn from a syrup, into a gel, then eventually a hard gel like consistency, so if you don't spread the resin around the entire mold before that final consistency happens, you will have some major problems with the finished cast. The amount of hardener you add, will effect the amount of time the resin will cure, so be careful!

Okay so, by now, you are probably wondering how on earth to manage this mold, it's floppy and doesn't retain shape. Most molds are usually already set in shape with smaller casts, but larger ones are difficult to manage, as it would be pretty pricey to buy so much silicone to create a firm mold. But all I can suggest is, when poured into the mold, use  support stand of container to keep the basic shape and keep checking it at 20 minute intervals to spread around the resin mix inside the mold. (I'm using a credit card to scrape it all around until it eventually becomes thick enough to line the entire mold. (Please use gloves, you don't really want this stuff on your hands or anywhere near any other part of your body, so work safely. For this particular project, I've used an old shoe box to set the mold in, so it keeps the basic shape. Add the resin in layers, so it is easier to work and eventually you'll have a set cast which is ready to un-mold when it is a firm block.

So after removing the mold, I ca now sand, polish and paint! When it comes to sanding, please be patient because this will require a few hours work, it's a matter of digging into every detail and leveling out any lumps, creases and anomalies in the finished product, but the result is worth it.

Dragon Priest Mask: Casted by PhoenixDestruction
Just need to finish with a cool paint design!

Overview


So now you have your finished product, so you can design it how you like, I'm going to add a really rustic effect onto my mask and maybe add some more onto it, but that far I haven't decided. If you haven't casted before, I recommend you start with something small and simple, so it is not a great loss if you make a mistake.

What you do with the finished mask is completely up to you. Wear it, sell it, there must be a reason to your initial cast so the next step is for you to decide only.

Here a few articles that may be useful to you, so please check them out!

Introduction to setting up your store by Talty
Artisan Crafts and copyright law by cakecrumbs

I hope you have enjoyed reading this article, and have fun in your future projects with casting, I hope this article helps. :love:

Credits


Dragon Priest Mask is owned by Bethesda Softworks, LLC. (c)

This method of casting is what I have used with inspirations of multiple methods I have picked up long the way of my hobby, it works for me so I must insist that you do not redistribute this article or it's images without my permission.

:iconcommunityrelations::iconprojecteducate::iconcrartisancrafts:


Join the community to add your comment. Already a deviant? Log In
Featured

Week 30, 2014 at #deviant356 by PhoenixDestruction, journal

Interview with - MorgansMutations by PhoenixDestruction, journal

Week 22, 2014 at #deviant365 by PhoenixDestruction, journal

Undiscovered Weekly Artisan Crafts by PhoenixDestruction, journal

Introduction to Casting. by PhoenixDestruction, journal